
Fence Extension, Privacy & Screen Installation Guide
From popular demand, below I will attempt to explain how to install our fence extension product. As every fence extension and privacy screen project is different, the process may need to be slightly altered.
The framing products and install process explained below may also be used to frame the garden screen, outdoor privacy screen and the DIY Vertical Garden Kit.
Scroll to the bottom to see the same framing product installed on our other outdoor privacy screens
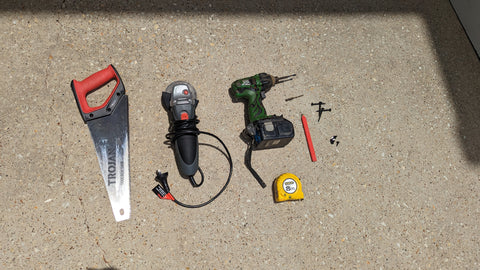
Tools Required
- Square (I have used the back of a hand saw)
- Grinder with metal cutting blade (Can substitute for hacksaw)
- Drill with Philips head and 1/8th metal drill bit
- Pencil
- Tape Measure
- Safety goggles and Earmuffs (If using grinder)
- Level (may be required)
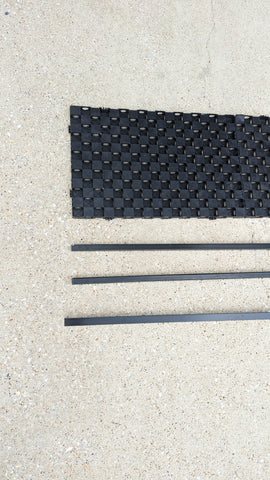
Fence Extension Parts
In the example photos, I create an example fence extension with half of 1 square meter of our 20mm fence extension product. The reason was, we only had enough L bar to frame the outside of two pieces of 20mm.
- Fence extension panels (2 out of 4 used in example)
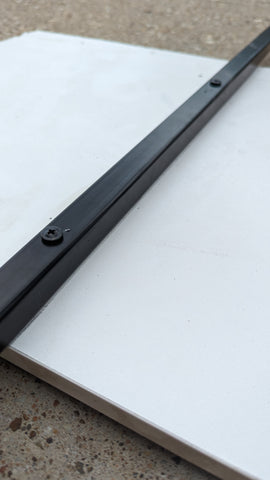
- Powder-coated aluminium L angle (25mm X 25mm X 1.4mm) 1. 9m lengths
- Fence extension legs (25mm X 25mm) 2 X 1m lengths
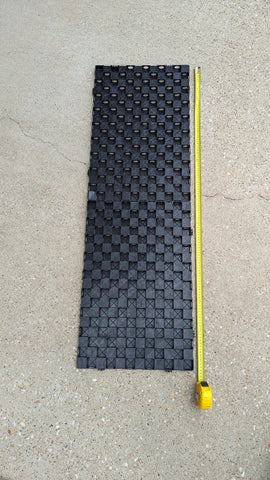
Step 1: Decide how the modular pieces will be connected and measure the width. This will be used to decide how far apart the legs will be.
Step 2: Measure and mark where the legs will be mounted. (The white board indicates a fence) The legs should have at least 300mm on the fence for strength of mounting then cover the full height of the panels. The legs can be shortened down from 100cm to your desired height if you desire.
Step 3: Pre drill then screw fence extension posts to fence or solid structure.
Step 4: Once extension legs have been mounted to the fence, pre-drill holes then screw panels to posts. You may decide to install the aluminium framing on the ground before mounting the panels to the posts (I did the framing after because I was only building it on the ground)

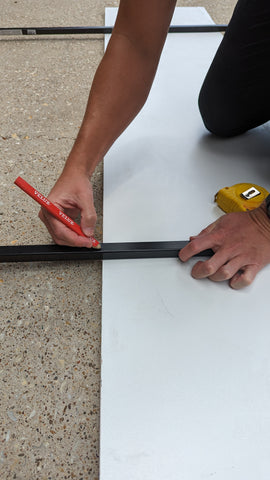
Step 5: Mark aluminium framing piece lengths. I marked perfect 45-degree angles that butted up to each other. But simply overlapping the pieces is ok as well.

Step 6: Cut the angles to size

Step 7: Install remaining pieces (most fence extensions would be much more than this example piece, so overlapping the pieces would be much easier)

I have pre-drilled and then fixed the aluminium corner panels every 400-500mm for extra stability.

Finished product. Totally modular fence extension that can be cut to height and width, then framed for extra stability and a visually pleasing finish.

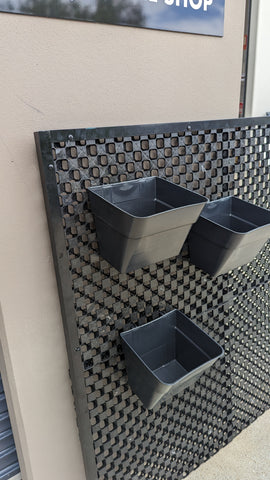
Same framing product installed on our Vertical Garden Kit
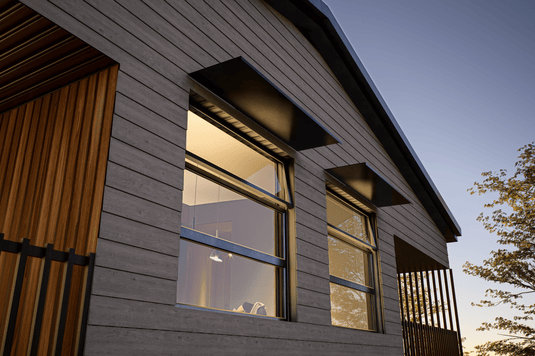
Also used below on our 50mm Outdoor Privacy Screen panel

For more information on these fence extensions please don't hesitate to contact us!


I bought your fabulous privacy screen earlier this year. I am so happy with the result. I no longer have to look into the homes of people who live across the street. Simple to click together and install. I highly recommend this product.